Lower Lid Blepharoplasty
Before and After Photo Gallery
See real results. Discover natural transformation with expert care.
Schedule a Consultation-
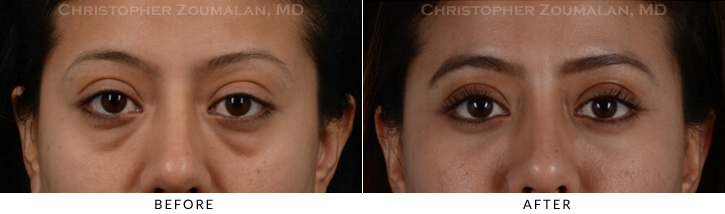 Patient Seeing Straight
-
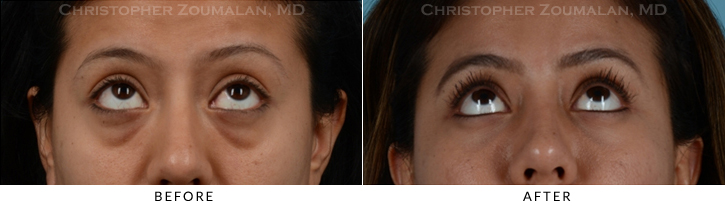 Patient Seeing Up
-
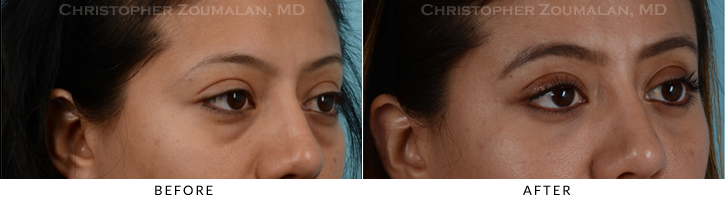
-
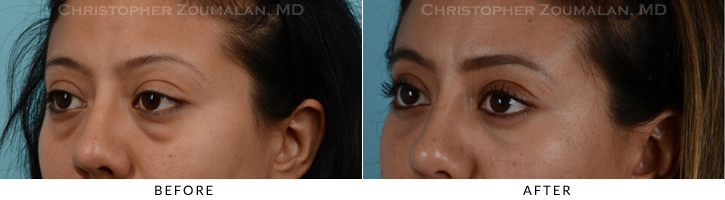 Patient Seeing Side
-
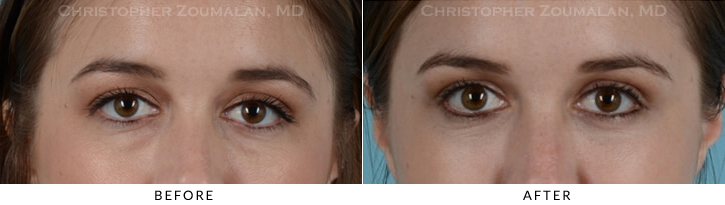
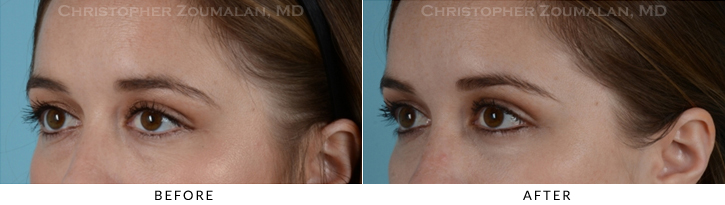
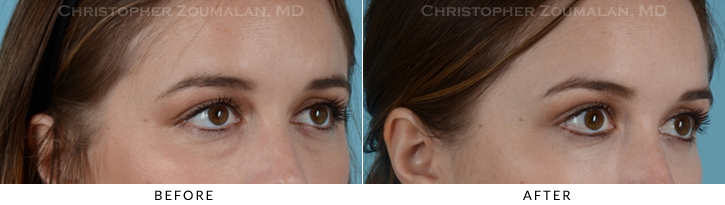
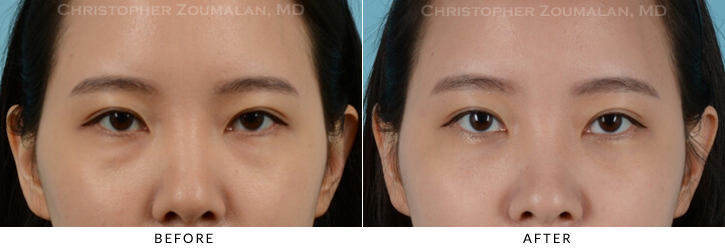
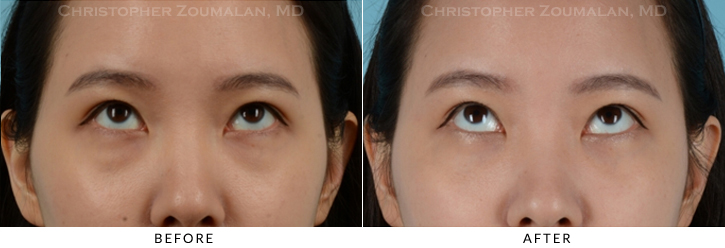
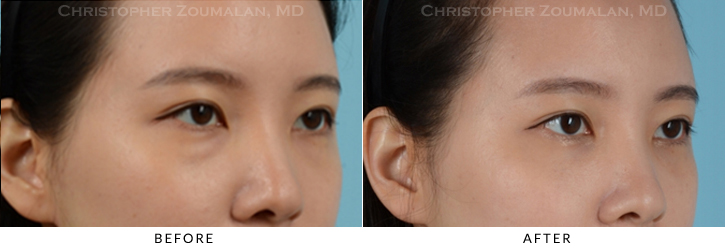
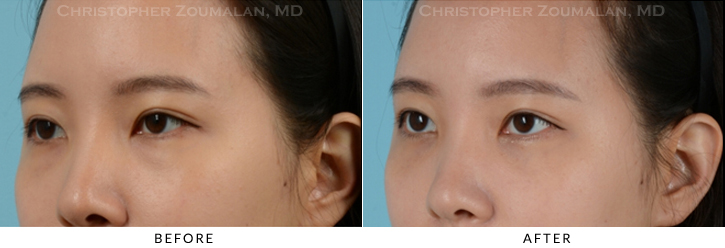
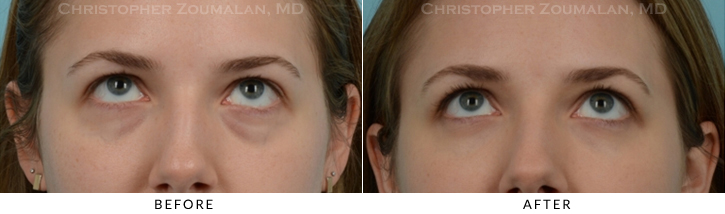
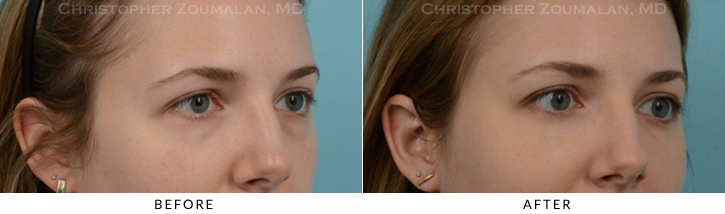
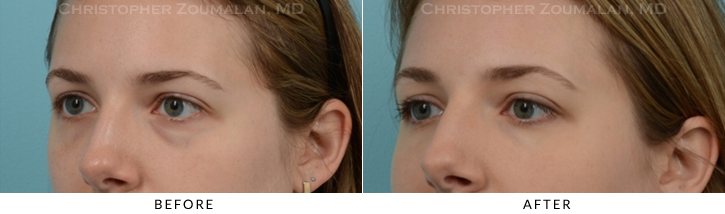
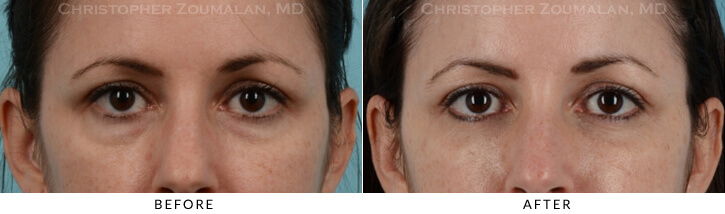
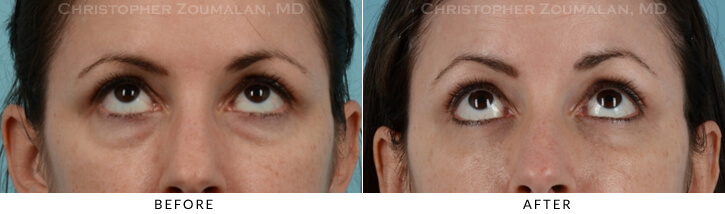
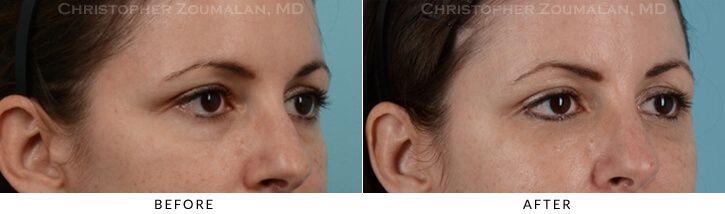
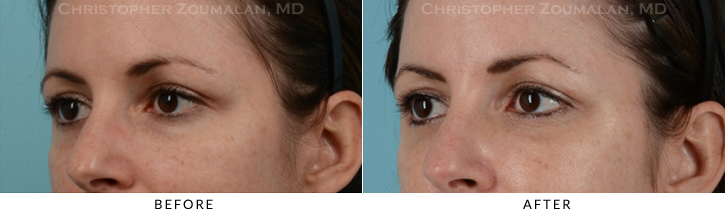
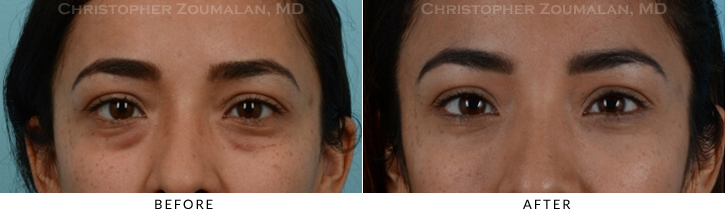
This patient underwent lower eyelid surgery to improve her appearance and remove her prominent lower lid fat pockets. Lower eyelid blepharoplasty with fat repositioning was performed to improve lower eyelids bags. This patient was relatively young but she had a genetic pre-disposition for lower eyelid fat proplapse. She was pleased with her natural looking results and resumed her usual activities after 1 week.
-
 Patient Seeing Straight
-
Patient Seeing Side
-
-
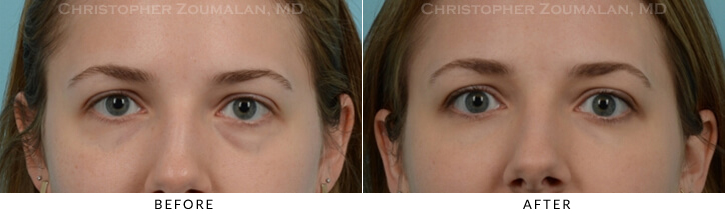
She underwent lower lid surgery to improve her appearance and remove her lower lid fat pockets which made her appear older although she is quite young. Lower lid blepharoplasty with fat repositioning was performed to improve lower eyelids bags. Note the natural looking results and refreshed appearance to her eyelids and face. This small enhancement has made a big difference in her appearance.
-
 Patient Seeing Straight
-
Patient Seeing Up
-
-
Patient Seeing Up
-
This young woman underwent lower lid surgery to improve her appearance and remove her lower lid fat pockets. Lower lid blepharoplasty with fat repositioning was performed to improve lower eyelids bags and make her appear more refreshed. Note the natural looking results and refreshed appearance to her eyelids and face.
-
 Patient Seeing Straight
-
Patient Seeing Up
-
-
Patient Seeing Side
-
This patient had visible lower eyelid fat pockets and wanted to seek solutions to have them removed. She underwent a lower eyelid blepharoplasty surgery to remove the excess fat pockets. No visible skin incision was made to her lower eyelids and the procedure was entirely made through a minimally invasive hidden incision. Her lower eyelids were also treated with a chemical to tighten the skin.
-
Patient Seeing Straight
-
Patient Seeing Up
-
-
Patient Seeing Side
-
This patient wished to undergo lower lid blepharoplasty to remove the excess fat pockets that made her look weary. Minimally invasive blepharoplasty techniques were used to carefully remove and reposition the fat. There wasn’t any skin removed, and the patient left looking refreshed but the result was still very natural. The downtime for this patient was only a week and she was back at work the following week looking more refreshed when she returned.
-
Patient Seeing Straight
-
Patient Seeing Up
-
-
Patient Seeing Side
-
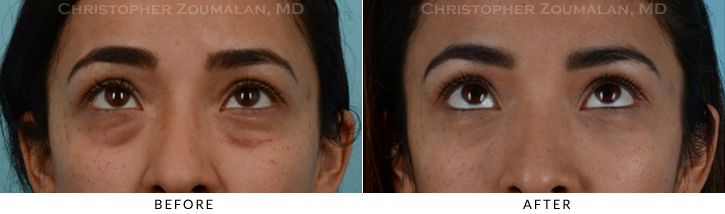
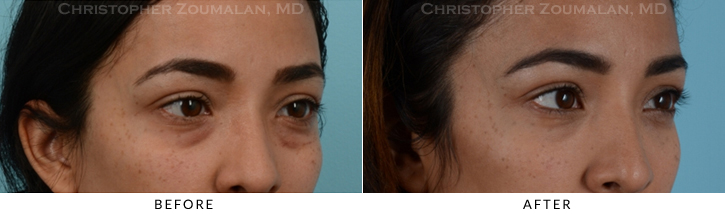
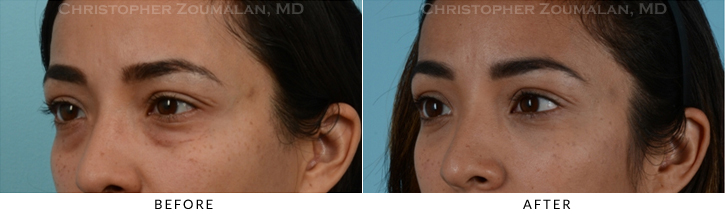
This young female patient underwent lower lid blepharoplasty with fat repositioning. This patient was unhappy with her eye bags and felt as though she looked tired all the time. The excess fat pockets were removed and the fat was repositioned so the patient is not left looking hollow under the eyes which can also make her appear tired. This photograph was taken nearly one year after her surgery and the patient has healed well. She looks more refreshed and well rested.
Disclaimer:
*Individual results may vary
All before and after pictures displayed are real patients who have consented to having their pictures published on our site. Individual results will vary with each patient and Dr. Christopher Zoumalan does not guarantee any outcomes of procedures shown. All pictures are meant for reference and illustrative purposes only.